Home office setup for back pain, neck pain, and eye strain
The single most effective thing you can do for desk pain is sequence your workstation adjustments correctly — chair height first, then keyboard position, then monitor height, then lumbar support, then foot support. That order matters because each element depends on the one before it. Get the chair wrong and every downstream adjustment compensates for a bad foundation.
At a Glance: - Root cause of most desk pain: Chair too low or high, screen at the wrong height, no lumbar support - Regulatory grounding: OSHA's Computer Workstations guidance frames workstation injuries as primarily ergonomic. Per OSHA: "There are no specific OSHA standards that apply to computer workstations or extremely low frequency electric and magnetic field exposure" — but the agency provides a detailed eTool and hazard/solution references that serve as the practical standard for setup. - Clinical grounding: NewYork-Presbyterian spine guidance specifically calls for raising the laptop or monitor to eye level, using lumbar support, propping up feet if needed, and changing position throughout the day. - Eye-break rule: CDC/NIOSH recommends the 20-20-20 rule — every 20 minutes, look at something 20 feet away for 20 seconds. - Key truth: No single setup works for everyone. Body size, footwear, bifocal lenses, and desk constraints all change the right position.
The fastest ergonomic fix sequence: chair, keyboard, monitor, lumbar support, feet
Work through these five steps in order every time you adjust your workstation. Skipping ahead and then doubling back costs you time and produces a worse result.
-
Set chair height so your elbows hang at roughly desk height. Sit back fully in the seat. Let your arms hang naturally at your sides. Raise or lower the chair until your elbows, when bent at roughly 90 degrees, sit at or just above the desk surface. This is your keyboard baseline.
-
Position the keyboard and mouse at that elbow height. If the desk is too high for the chair height that feels right, you have a mismatch — a keyboard tray or a lower desk solves it. OSHA's workstation example calls for "elbows close to body and supported, wrists and hands in-line with forearms" as the neutral standard.
-
Raise the monitor top to eye level or just below. Per OSHA's eTool neutral-posture example: "Top of monitor at or just below eye level. Head and neck balanced and in-line with torso." Stack books under the monitor, use the built-in stand adjustment, or add a monitor arm if neither gets you there.
-
Add lumbar support. Your lower back should press gently against the chair's lumbar curve, keeping a slight inward arch. If your chair lacks this, a rolled bath towel or a $30 lumbar cushion behind your lower back fills the gap until you're ready to buy an ergonomic chair.
-
Add foot support if your feet don't rest flat. If raising the chair to reach elbow height lifts your feet off the floor, add a footrest — or, temporarily, a stack of hardcover books. Dangling feet shift load onto the thighs and lower back within minutes.
Pro Tip: Run through the full sequence whenever you switch chairs, change your footwear significantly (work boots to bare feet is a 1–2 inch shift), or move to a different desk. Your ideal position is not fixed.
Why no single desk setup works for everyone
The adjustments above give you the right method, not a universal set of measurements. Your ideal chair height depends on your inseam, your desk height, and whether you're wearing shoes with significant heel height. A 5'4" person in running shoes and a 6'2" person in dress shoes sit at different effective heights even in the same chair at the same desk.
FitVariables — four things that change your ideal position: - Body size: Torso-to-leg ratio determines how the chair's lumbar curve lines up with your spine. Short-torso people often find the lumbar bump hits mid-back instead of lower-back. - Footwear: A 1.5-inch heel lifts your effective foot platform by 1.5 inches — enough to create pressure behind the knees or change lumbar curve. - Bifocal lenses: If you wear bifocals, placing the monitor at standard eye level may force you to tilt your head back to read through the lower portion of the lens. OSHA's workstation guidance acknowledges this; bifocal users often need the monitor several inches lower. - Desk constraints: A fixed-height desk with no keyboard tray limits how closely you can match the ideal position. Identify which constraint is the bottleneck before spending money.
How to set up a home office for back pain
Back pain from a desk almost always traces to one of three faults: chair height is wrong, there's no lumbar support, or the feet aren't fully supported. Fixing all three costs almost nothing to test and often resolves the pain within a day or two of consistent use.
Symptom-to-fault map:
| Symptom | Most likely workstation fault |
|---|---|
| Low-back ache that worsens through the day | No lumbar support; pelvis rolling backward into a C-curve |
| Tailbone or seat pain | Chair too high, feet dangling, weight on coccyx |
| Mid-back stiffness | Monitor too low, causing forward lean; desk too high, causing shoulder shrug |
| Pain that improves when you stand | Chair height wrong for your desk; lumbar support absent |
| Pain that improves when you walk around | You're simply not moving enough — setup plus breaks needed |
OSHA's workstation examples consistently call for "lower back supported" and "feet flat on the floor" as non-negotiable baseline requirements. OSHA also notes that supportive chairs should allow elbows to hang normally at the sides of the body, with foot rests provided where needed. Those three points — lumbar, feet, elbows — together resolve the most common causes of desk-related back pain.
LowCostFix — test before you spend: - Lumbar support: Roll a bath towel to about 4 inches in diameter and place it horizontally against your lower back. If the pain improves, a $25–$50 lumbar cushion or a chair with a built-in curve will work. - Foot support: Stack two to three hardcover books or a sturdy box to give your feet a flat platform. If pain improves, a dedicated footrest (around $25–$40) is worth buying. - Seat height: If you can't adjust your chair, sitting on a firm cushion or folded blanket raises your effective seat height in 1-inch increments.
Chair height and lumbar support for lower-back relief
The single most common chair fault that triggers lower-back pain is a seat set too low. When the seat is too low, the pelvis tilts backward and flattens or reverses the natural lumbar curve, putting sustained compressive load on the discs and surrounding muscles. Most people instinctively slide forward to the edge of the seat, which makes it worse.
ChairFit checklist: - Thighs roughly parallel to the floor, not angled sharply up or down - Feet flat on the floor or on a footrest — not dangling, not jammed hard into the floor - Lower back making contact with the chair's lumbar curve, not hovering away from it - Hips at or slightly higher than knee level (some ergonomists prefer 5–10 degrees of forward tilt) - Shoulders relaxed, not shrugged — armrests (if present) should allow this without forcing elbows outward
OSHA's neutral-posture example specifies: "Lower back supported." That's it — two words — but it's the item most chairs and most people get wrong. Chairs also need armrests set so the elbows hang normally at the sides of the body, per OSHA's supportive-chair guidance, because arm position feeds directly into shoulder and upper-back load.
If your chair has no lumbar curve — or the curve hits the wrong part of your back — a rolled towel works as an immediate fix. Keep the roll fairly firm, position it at the natural arch (usually just above belt level), and secure it with the chair's back pressure. Don't let the towel push your torso so far forward that your back lifts away from the seatback entirely. If you find yourself buying a new lumbar cushion every few months, that's the signal to invest in an ergonomic chair with proper adjustable lumbar — options from Herman Miller, Steelcase, and Humanscale are widely available and worth the investment for full-time remote workers.
When a footrest or stacked books solves the problem
Feet matter more than most people expect. When the chair is raised to achieve proper elbow-to-keyboard alignment, shorter users often find their feet no longer rest flat — they either dangle or press in at the tips of the toes. Both postures push load onto the back of the thigh and the lumbar spine.
LowCostFix — foot support options by cost: - Free: A thick hardcover book (at least 2 inches of height) or a sturdy cardboard box cut to a stable platform. Test it for one work session. - ~$25–$40: Dedicated ergonomic footrests with adjustable angle. The Amazon Basics Adjustable Footrest runs around $30 and is adequate for most users. - ~$80–$150: Rocker-style footrests that allow small foot movements, which improves circulation during long sitting sessions.
OSHA's workstation guidance explicitly calls for feet flat on the floor and supportive chairs that include foot rests where needed. The constraint to respect: the footrest must be stable, sized so the feet sit fully on it, and low enough that knees aren't sharply elevated above hip level. A footrest that tilts the knees up sharply creates its own hip-flexor and low-back problems.
How to set up a home office for neck pain
Neck pain almost always comes from looking at a screen that is too low. When the monitor is below eye level, you flex the cervical spine forward — the classic "tech neck" posture — and for every inch the head tilts forward, the effective load on the neck roughly doubles. The fix is straightforward: raise the screen so your gaze lands at or near the top of the display.
Monitor-height checklist: - Sit back fully in the chair with eyes at a natural, relaxed forward gaze - The top edge of the monitor should meet roughly the level of your pupils — or just below - You should not need to tilt your chin up or down to see the top quarter of the screen - The screen should face you straight (not angled away), reducing the need to rotate or twist the neck - If you find yourself leaning forward within 20 minutes, the monitor is either too far away or too low — check both
OSHA's computer workstations guidance states clearly: "Place the monitor in front of you at a height where you can look straight ahead and not tilt your head forward or backward." The eTool neutral-posture example adds that the head and neck should remain "balanced and in-line with torso."
When a stand cannot get the display high enough, a monitor arm is the cleanest fix because it lifts, tilts, and moves the screen deeper on the desk without taking up footprint. The Ergotron LX Desk Monitor Arm (around $45–$60 on Amazon) handles monitors up to 34 inches and provides full height, tilt, and depth adjustment. It clamps to the desk edge and frees up the entire monitor footprint. The Ergotron HX handles heavier ultrawides up to 49 inches if you're running a larger display.
Watch Out: Laptop users cannot raise the built-in screen to eye level without also raising the keyboard — which forces wrists and shoulders into a poor position. The fix is always a laptop riser or external monitor plus an external keyboard and mouse. You cannot solve this with the laptop alone.
If you wear bifocals, the standard "top of screen at eye level" rule may need to be adjusted downward. Looking through the reading portion of bifocal lenses typically requires a slight downward gaze — if the screen is at standard height, bifocal wearers often tilt the neck back to align the lenses, creating a different type of neck strain. Drop the monitor 2–4 inches below standard eye-level height and see if that resolves the tilt.
Use a monitor distance cue that reduces forward head posture
The right screen distance keeps your head balanced without requiring squinting, leaning, or forward-head creep. The common ergonomic cue is arm's length — roughly 20–28 inches — but OSHA's guidance emphasizes neutral head position over any single fixed measurement. If you can read the screen comfortably without leaning forward, you're in the right zone.
A monitor arm helps here too. You can push the screen back 4–6 inches compared to a fixed stand, which often makes a meaningful difference in forward head posture for people with smaller desks who've been forced to work closer than optimal. A laptop riser like the Rain Design mStand (around $40) pairs with an external keyboard and mouse to create a similar result for laptop users — screen at distance and height, hands at elbow level.
Pro Tip: If your font size needs to increase significantly to read at arm's length, your prescription may need updating. Poor distance vision forces leaning. Rule out the prescription before assuming the monitor distance is wrong.
How to fix eye strain from a home office
Eye strain from desk work has three main causes: glare hitting the screen, brightness that's too high or too low relative to the room, and looking at the screen for too long without breaking focus. The monitor height addressed in the previous section plays a supporting role — when the screen is too close or too far, users squint or lean forward, worsening both eye strain and neck posture simultaneously.
CDC/NIOSH recommends the 20-20-20 rule specifically for eye fatigue: "Focus your gaze on an object 20 feet away for 20 seconds every 20 minutes." That's the break cadence — but it works best alongside a setup that minimizes the strain accumulating between breaks.
Eye-strain diagnostic sequence: 1. Is there a window behind or beside you reflecting in the screen? → Reposition desk or add blinds first. 2. Is the screen brightness much brighter than the room? → Match brightness to ambient light. 3. Is the room too dim, making the screen look harsh? → Add task lighting behind or beside the monitor, not aimed at the screen. 4. Is the monitor less than 20 inches away? → Push it back or reduce font size. 5. Are you blinking noticeably less than normal? → Use the 20-20-20 rule more deliberately; consider artificial tears if dryness persists.
OSHA's workstation-environment guidance treats lighting and glare control as core ergonomic-environment issues — not secondary concerns. Get those right first before adjusting screen settings.
Reduce glare with window position, screen brightness, and task lighting
Glare is the most common and easiest-to-fix cause of home-office eye strain. It comes from two directions: reflected glare (a bright window or light source mirrored in the screen) and direct glare (light shining directly into your eyes from behind or beside the screen).
GlareControl checklist: - Windows should be to your side — not in front of or behind you. A window behind you reflects into the screen; a window in front of you creates a bright backdrop that forces the pupil to contract, making the screen look dim. - If you can't reposition the desk, close the blinds during peak sun hours and use task lighting to compensate. - Set screen brightness to match ambient room brightness — your screen and your wall should look roughly the same luminance. Most people leave screens too bright in the morning and too dim at night. - Enable night mode or reduce blue-light output in the afternoon; this reduces the harshness of the display without dimming it fully. - OSHA's workstation-environment guidance recommends that task lighting illuminate the work area without reflecting directly off the screen surface.
For task lighting, the goal is to raise the ambient light level around your desk so the screen doesn't look harsh by contrast — not to shine a lamp at the monitor. A bias light (a low-intensity LED strip mounted behind the monitor facing the wall) is one of the most effective options and runs $20–$40. A good desk lamp like the BenQ ScreenBar (around $110) clips to the top of the monitor and illuminates the desk surface without any glare on the screen — it's purpose-built for exactly this problem. A simpler $30–$40 LED task lamp with adjustable color temperature gets the job done at a lower cost if the ScreenBar is out of budget.
Use the 20-20-20 rule and screen-distance breaks
CDC/NIOSH is direct: "Try the 20/20/20 rule to help combat eye fatigue." Every 20 minutes, shift your gaze to something about 20 feet away and hold it there for 20 seconds. This lets the ciliary muscles that control lens focus relax — those muscles fatigue from sustained close focus the same way leg muscles fatigue from sustained standing.
The 20-20-20 rule covers only your eyes. It is not a substitute for moving your body, and it doesn't replace fixing the underlying glare or distance problem. Pair it with brief posture resets — stand up, take a few steps, drop and roll your shoulders — so you're not logging eight hours of perfect 20-20-20 breaks while still locked in one static position. NYP's spine guidance specifically advises against staying in one position all day, even a good one.
BreakCadence: - Every 20 minutes: 20-20-20 eye break (per CDC/NIOSH) - Every 45–60 minutes: Stand, walk for 2–3 minutes, reset posture before sitting again - End of each morning and afternoon block: Full stretch — neck rolls, shoulder circles, lumbar extension
Set a recurring timer. Most people underestimate how long they've been sitting until they stand up and feel it.
How to fix wrist and shoulder discomfort at a desk
Wrist and shoulder pain from desk work usually trace to the keyboard and mouse sitting too high. When the desk surface is above elbow height, you shrug the shoulders to reach the keys, which loads the trapezius and shoulder muscles continuously. If the keyboard is angled up sharply (positive tilt), the wrists bend back into extension, which compresses the carpal tunnel and stresses the tendons.
OSHA's workstation example calls for "shoulders relaxed, elbows close to body and supported, wrists and hands in-line with forearms" as the neutral position. The mouse should sit close to the keyboard — reaching to the side for the mouse is a shoulder-strain pattern that compounds quickly over a full workday.
Arm position checklist: - Elbows at or just below desk/keyboard height, hanging naturally from the shoulders - No shrugging — if the armrests push the shoulders up, lower the armrests or remove them - Wrists neutral or in very slight negative tilt (angled downward, not upward) - Mouse within a couple of inches of the keyboard's right edge (or left, for left-handers) - No wrist rest while actively typing — wrist rests are for pauses, not for use during keystrokes
Keep keyboard and mouse near elbow height
The desk-height-to-elbow-height relationship is the central problem for wrist and shoulder pain. If the desk is set at a fixed height that's too tall for you after adjusting the chair, you have a few options: lower the chair (which may require adding a footrest), add a keyboard tray below the desk surface, or use a height-adjustable desk.
Per OSHA's guidance: "Elbows close to body and supported." The mouse should stay close to the keyboard, per OSHA's pointer/mouse guidance. Reaching laterally or forward for a mouse, even by 6 inches, creates sustained shoulder abduction that triggers rotator-cuff and upper-back fatigue.
For laptop users, raising the screen to eye level without adding an external keyboard and mouse is the most common wrist-and-shoulder mistake. Once the laptop is on a riser, the keyboard is at chest or chin level — which is completely unusable ergonomically. An external keyboard like the Logitech MX Keys (around $110) paired with the Logitech MX Master 3S (around $100) covers this cleanly. Budget options like the Logitech K380 (~$40) and any wired mouse under $20 work fine if you're testing before committing.
When a keyboard tray helps and when it makes things worse
A keyboard tray drops the input surface below the desk surface, which helps tall-desk or fixed-desk setups where the keyboard can't otherwise reach elbow height with the chair at a useful height.
| Situation | Keyboard tray: helpful? |
|---|---|
| Fixed-height desk too tall for your chair | Yes — drops keyboard to proper elbow height |
| Desk already at elbow height | No — reduces legroom, adds no benefit |
| Short user with legs already compressed | No — a tray cuts into limited knee clearance |
| Nonadjustable tray at wrong angle | No — forces wrist extension, often worse than nothing |
| Laptop user who raised screen on riser | Yes — frees you from using the laptop keyboard at chest height |
The failure mode of most budget keyboard trays is that they're either too shallow (the mouse hangs off the edge), too low (forces the wrists into flexion), or nonadjustable in angle. OSHA's guidance on adjustable workstation components emphasizes that components must allow different-height users to maintain neutral postures — a nonadjustable tray that doesn't fit your specific combination of height and desk is worse than no tray.
Low-cost fixes versus premium ergonomic upgrades
The right framework: use cheap tests to identify which variable is causing pain, then spend money on a permanent solution only after you've confirmed the test worked. Buying a $1,200 chair when the real problem is monitor height is a common and expensive mistake.
| Pain point | Budget fix (under $50) | Mid-tier upgrade ($50–$200) | Premium upgrade ($200+) |
|---|---|---|---|
| Lower-back pain | Rolled towel + stacked books | Lumbar cushion + adjustable footrest | Herman Miller Aeron or Steelcase Leap (~$1,100–$1,500 new, ~$300–$600 refurbished) |
| Neck pain / monitor height | Stack of books under monitor | Standalone monitor riser ($25–$50) | Ergotron LX monitor arm (~$45–$60) |
| Eye strain / glare | Reposition desk, close blinds | LED bias light ($20–$40) | BenQ ScreenBar task light (~$110) |
| Wrist/shoulder pain | Negative-tilt keyboard test | Logitech K380 keyboard + basic mouse (~$60 combined) | Logitech MX Keys + MX Master 3S (~$210 combined) |
Budget fixes under $50 to test before buying furniture
Low-cost trials confirm the diagnosis. Run each one for a full workday before deciding:
- Monitor too low: Stack 2–4 hardcover books under the monitor base. If neck pain decreases noticeably within a day, a monitor arm or riser is worth buying.
- No lumbar support: Roll a bath towel firmly to about 3–4 inches in diameter. If lower-back ache improves, a lumbar pillow or ergonomic chair is justified.
- Feet dangling: Use a sturdy box or stack of books as a footrest platform. Stable and flat matters more than aesthetics at this stage.
- Keyboard too high: Try sitting on a firm folded blanket or cushion to raise yourself relative to the desk. If shoulder and wrist tension drops, you have a height mismatch that needs a real solution.
- Eye strain from room lighting: Work with the window blinds closed and a single desk lamp aimed at your desk (not the screen) for one full session. If strain decreases, task lighting is the investment to make.
None of these improvised fixes are long-term substitutes for stable furniture. They're diagnostic tools. OSHA's workstation guidance acknowledges improvised supports as workable workarounds while making the point that stable, adjustable equipment is the actual solution.
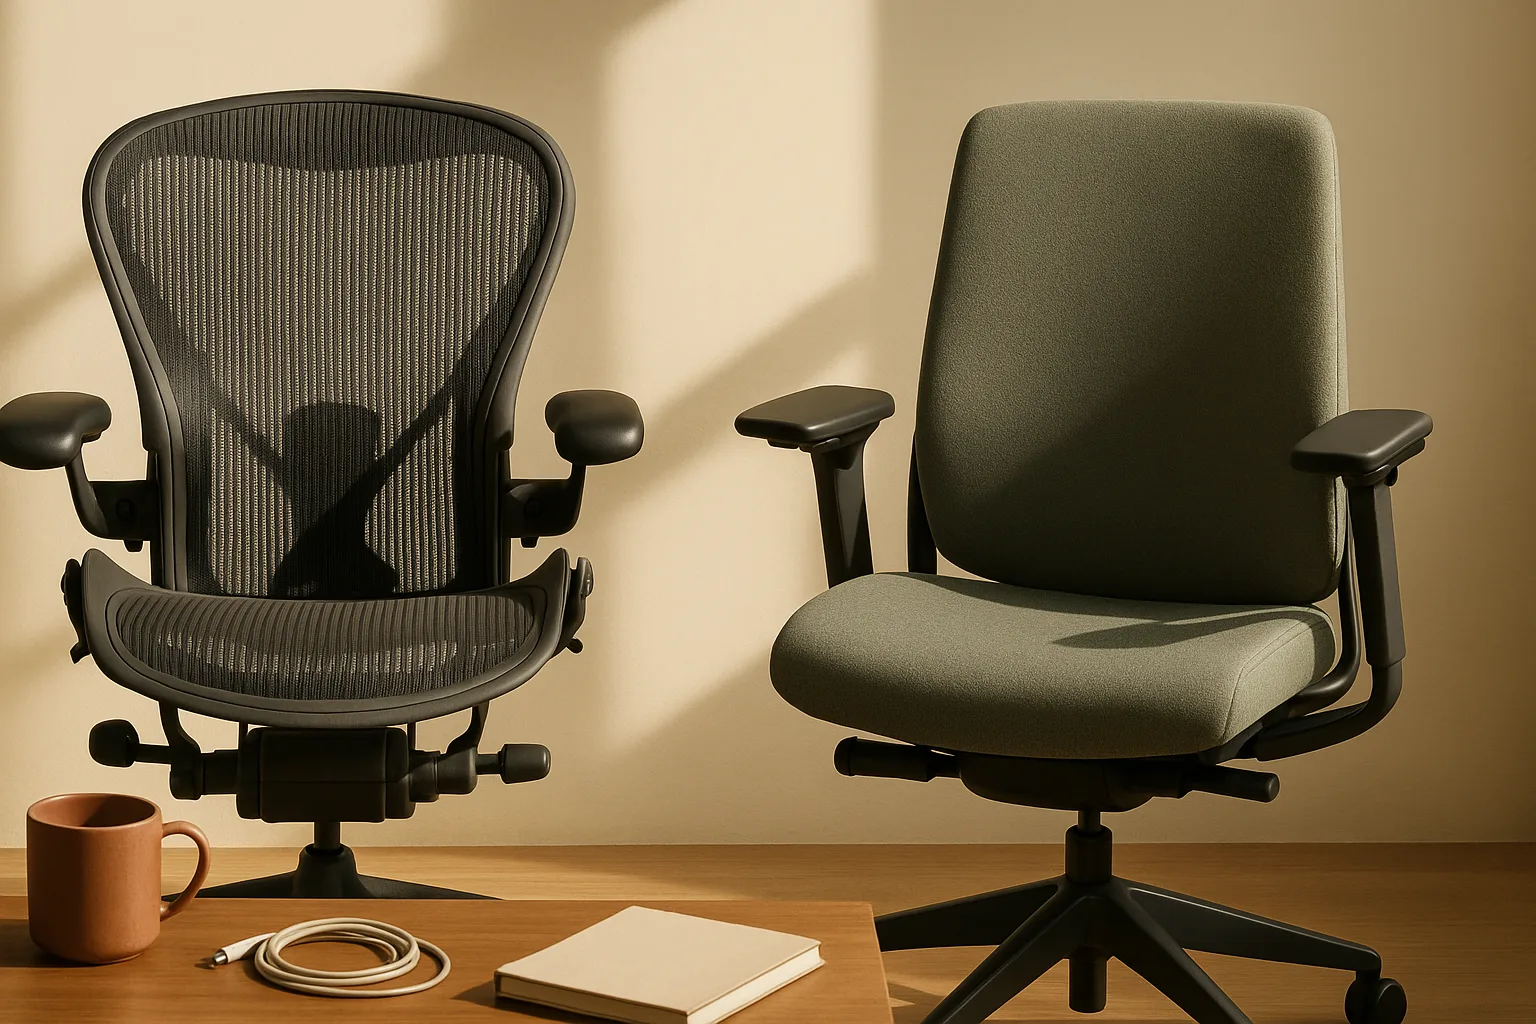
When an ergonomic chair or monitor arm is worth the money
Spend on a premium ergonomic chair when your current chair fails at least two of these: adjustable seat height, lumbar support with meaningful curve, stable arm rests that don't force shoulder shrug, and a seat pan deep enough to support your thighs without pressing behind the knees. A chair that fails multiple criteria won't be fixed by cushions and towels for full-time remote work.
The Herman Miller Aeron (size B for most average-build adults, around $1,100–$1,500 new) and the Steelcase Leap V2 (around $1,300 new) are the most consistently recommended options for full-time office chairs. Both have robust resale markets — refurbished Aerons run $300–$600 depending on condition, which is the right entry point for most people not ready to buy new. Humanscale's Freedom chair (around $1,400 new) is worth considering if you want automatic recline without manual adjustments.
Spend on a monitor arm when the monitor cannot reach proper eye-level height using the built-in stand, when you're sharing a desk and need to swing the screen out of the way, or when reclaiming the monitor footprint meaningfully improves your usable desk space. The Ergotron LX is the clearest value — it works for most 24–32-inch monitors, adjusts smoothly, and holds position reliably. Spend more only if you have a particularly heavy or wide monitor.
Red flags that mean this is a medical issue or a pro setup problem
OSHA's Computer Workstations guidance makes an important point: injuries associated with computer workstations "are often ergonomic in nature and may be difficult to diagnose." That difficulty in diagnosis is a reason for a low threshold on professional evaluation — not a reason to keep adjusting your chair and hoping.
Most desk discomfort resolves with the adjustments in this article within a few days of consistent correction. Pain that doesn't follow that trajectory, or pain accompanied by certain specific symptoms, needs medical attention, not a new lumbar pillow.
Pain signs that need medical evaluation
Stop treating these as ergonomic problems and see a physician:
When to Call a Pro: - Numbness or tingling in the hands, fingers, or arms — especially if it persists when you're not at the desk - Weakness in the grip, arm, or hand that you can't explain by fatigue - Radiating pain that travels from the neck into the arm, or from the lower back into the leg (sciatica pattern) - Persistent eye symptoms — blurred vision, double vision, or eye pain that continues after breaks and after fixing glare — may indicate a vision or neurological issue - Pain that wakes you at night — desk setup doesn't cause pain at 3 a.m.; something else does - Symptoms that worsen despite correct setup — if you've applied all the adjustments in this article consistently for two weeks and pain is increasing, there is likely an underlying structural issue
NewYork-Presbyterian's spine guidance supports seeking professional evaluation when conservative measures don't produce improvement. Ergonomic fixes address postural loads — they don't treat disc herniation, nerve compression, carpal tunnel syndrome, or rotator cuff tears.
When your desk or chair cannot be made safe enough
Some workspaces simply cannot be made safe with DIY adjustments:
When to Call a Pro: - Severe fixed desk-height mismatch: A desk that is structurally fixed at the wrong height (mounted built-ins, antique writing desks) may require a professional to recommend whether a platform, riser, or replacement is the right path. - Nonadjustable chair at wrong height: If the chair seat height cannot reach the range where your elbows and feet are both properly positioned, that chair needs to be replaced — not patched. - Cramped layout: If the desk is too small to allow proper monitor distance (at least 20 inches), or if the room constrains the desk position so that window glare cannot be controlled, a professional ergonomic assessment can identify options you may not have considered. - Returning to work post-injury: If you're setting up a home office after a back surgery, a shoulder injury, or a repetitive strain diagnosis, a certified ergonomics professional (look for the CPE designation — Certified Professional Ergonomist) should assess your specific setup rather than you relying on general guidance.
An ergonomic chair like the Aeron or Leap can solve the nonadjustable-chair problem at any budget level — the refurbished market makes solid options accessible at $300–$600.
OSHA rules for home office ergonomics and safety
OSHA's position on home office ergonomics is specific and worth understanding exactly — because many articles either overstate OSHA's regulatory reach or ignore it entirely.
What OSHA says about computer workstations
Per OSHA's Computer Workstations guidance: "There are no specific OSHA standards that apply to computer workstations or extremely low frequency electric and magnetic field exposure." That's a direct quote. OSHA does not have a regulation that specifies chair height, monitor placement, or lumbar support requirements.
What OSHA does have is the Computer Workstations eTool — a detailed, free resource that maps common workstation hazards to practical solutions for monitor placement, keyboard height, chair fit, lighting, and environment. The eTool is the practical reference for workstation setup guidance, even though it isn't backed by an enforceable standard. The guidance it contains aligns with what occupational health researchers and physical therapists recommend and is the basis for most of the setup advice in this article.
The agency's framing is important: computer-workstation injuries are classified as primarily ergonomic in nature, which is why proactive workstation adjustment matters even in the absence of a mandating regulation.
Electrical, radiation, and noise hazards that still matter
Even without a specific computer-workstation standard, OSHA states that "existing OSHA standards on electrical safety, radiation exposure, and noise apply to all workplaces including office environments." For home offices, the practical implications:
- Electrical safety: OSHA's electrical wiring methods requirements under 29 CFR 1910.305 apply to general industry workplaces. For your home office, the relevant practical concern is safe power strip use, avoiding overloaded circuits, and not running extension cords under rugs or through doorways — all of which create fire and shock hazards that are covered under general electrical safety principles.
- Radiation exposure: OSHA states radiation standards may apply to office environments. Modern computer monitors produce negligible ionizing radiation and low levels of non-ionizing electromagnetic fields — OSHA explicitly notes there is no specific standard for ELF (extremely low frequency) electric and magnetic field exposure from workstations. This is not a meaningful hazard for standard home-office setups.
- Noise: In environments with sustained loud noise (uncommon in most home offices but relevant if you work near HVAC equipment, workshop spaces, or live in high-traffic areas), OSHA noise exposure standards provide reference limits. Most remote office workers won't encounter this threshold.
Home office ergonomic setup checklist
Run through this list at initial setup and whenever you change a variable — new chair, new desk, new footwear pattern, new monitor.
Daily posture and movement checklist
Setup (do once, revisit whenever something changes): - [ ] Chair height set so elbows hang at desk/keyboard level - [ ] Keyboard and mouse positioned at elbow height, close to the body - [ ] Monitor top at or just below eye level - [ ] Lower back in contact with lumbar support (chair curve or cushion) - [ ] Feet flat on floor or on footrest — no dangling, no tip-toe - [ ] Monitor at arm's length — roughly 20–28 inches from eyes - [ ] No window directly behind or in front of you creating screen glare - [ ] Task lighting aimed at desk surface, not at screen - [ ] External keyboard and mouse if laptop screen is raised on a riser or arm
During the workday: - [ ] Every 20 minutes: 20-20-20 eye break — look 20 feet away for 20 seconds (per CDC/NIOSH) - [ ] Every 45–60 minutes: Stand, walk briefly, reset sitting position when you return - [ ] Posture reset when you sit back down: Sit fully back in the seat, re-engage lumbar support, relax shoulders before typing - [ ] No sustained forward head posture — if you're leaning toward the screen, check monitor distance and font size - [ ] Wrists neutral — not bent up toward the ceiling during keystrokes
NYP's spine guidance and OSHA's workstation resources both support movement breaks as a core part of the maintenance plan — not an optional add-on. A perfect ergonomic setup in a static, unmoving body still produces pain over a full workday.
FAQ: home office ergonomics for pain relief
How do I know if my chair height is correct?
Sit fully back in the seat. Let your arms hang naturally. Your elbows should land at roughly the same height as your desk surface — or just above it. Feet should rest flat on the floor without tucking under the chair or extending forward to reach. If you can't achieve both at the same chair height, use a footrest to resolve the conflict. OSHA's workstation example calls for "feet flat on the floor, elbows close to body and supported" as the baseline.
What is the best monitor height for eye strain and neck pain?
The top edge of the monitor should sit at or just below eye level, per OSHA's neutral-posture example. Your gaze should land naturally on the upper third of the screen without tilting your chin up or down. For most people, this means raising the monitor several inches above where it sits on a standard desk surface. Bifocal wearers may need the screen slightly lower to read through the correct portion of the lens.
How often should I take breaks from sitting at a desk?
For eyes: CDC/NIOSH recommends the 20-20-20 rule — every 20 minutes, look at something 20 feet away for 20 seconds. For your body: stand and move briefly every 45–60 minutes. NYP's spine guidance explicitly advises against staying in one position all day, even a correct one. The breaks are part of the ergonomic solution, not optional recovery.
Do I need a footrest?
Only if your feet don't rest flat on the floor when the chair is set at the correct elbow height. If you're short enough that raising the chair to keyboard height lifts your feet off the floor, a footrest is necessary — not optional. Stacked books or a sturdy box work as a test. A $25–$40 adjustable footrest works for permanent use. OSHA's workstation guidance explicitly includes footrests in supportive workstation setups.
What task lighting helps with eye strain?
The goal is to reduce the contrast between your bright screen and a dim room. A desk lamp or LED bias light behind the monitor (illuminating the wall behind the screen) reduces that contrast without creating glare on the display surface. OSHA's workstation-environment guidance treats lighting and glare control as core ergonomic-environment issues. Aim for roughly equal brightness between your screen and the surrounding area, and keep lamps out of your direct line of sight and away from the reflective screen surface.
Sources & References
- OSHA Computer Workstations — OSHA's primary guidance page on computer workstation hazards; source of the no-specific-standard statement and general ergonomic framing
- OSHA Computer Workstations eTool — Detailed hazard/solution reference for monitor, keyboard, chair, and environment setup
- OSHA Neutral Posture Workstation Example — Specific workstation illustration with eye-level monitor, lumbar support, and foot-flat requirements
- OSHA Pointer/Mouse Guidance — Specific guidance on monitor placement and mouse/keyboard positioning
- OSHA Workstation Environment — Lighting and glare control guidance for computer workstations
- OSHA 29 CFR 1910.305 — Electrical Wiring Methods — General industry electrical safety requirements applicable to office environments
- CDC/NIOSH Working from Home Bulletin — Source of the 20-20-20 rule for eye fatigue and working-from-home ergonomic guidance
- NewYork-Presbyterian — How to Prevent Tech Neck — NYP spine guidance on monitor height, lumbar support, foot support, and positional change throughout the day
Keywords: OSHA Computer Workstations guidance, OSHA ergonomics eTool, 29 CFR electrical safety, OSHA radiation exposure standards, NewYork-Presbyterian spine guidance, monitor arm, ergonomic chair, lumbar support, footrest, task lighting, keyboard tray, external keyboard, external mouse, bifocal eyeline, 20-20-20 rule