Good backyard lighting isn't about buying more fixtures — it's about putting the right fixture in the right zone. String lights handle ambient atmosphere overhead. Path lights keep guests safe on their feet. Lanterns fill corners and tables with movable warmth. Get those three roles sorted before you buy a single bulb, and every purchasing and placement decision becomes easier.
How to choose backyard lighting by zone
The simplest decision rule: string lights for atmosphere, path lights for safety, lanterns for flexibility, and smart controls if you want schedules and dimming. Each fixture type solves a different problem, and treating them as interchangeable is the fastest way to end up with a yard that feels either cavernous or overlit.
[Image: Zone diagram — overhead ambient, task, and path lighting zones mapped on a small suburban backyard]
The U.S. Department of Energy's Exterior Lighting Control Guidance frames effective outdoor lighting around control zoning — mapping distinct lighting zones, then wiring and controlling each independently. That principle translates directly to backyard entertaining: your overhead string lights, grill-area task lighting, and path fixtures don't all need to turn on at the same brightness at the same time. The DOE notes that "automatic controls can provide several major benefits to owners of exterior and parking structure lighting systems, including substantial energy and maintenance cost savings." Practically, this means a photocell timer that turns your string lights on at dusk and off at 11 p.m. is smarter than running everything at full power all night.
Think of your backyard in three zones before buying anything:
- Zone 1 — Overhead/perimeter ambient: String lights over the patio, deck, or pergola
- Zone 2 — Task: Focused light near the grill, dining table, and serving station
- Zone 3 — Circulation: Path lights along walkways, steps, and garden edges
Perimeter and overhead ambient lighting for patios and decks
String lights are the right fixture for Zone 1 because they distribute soft, 360-degree light across a large area without pointing a beam in anyone's eyes. A single 48-foot run of LED Edison bulb string lights hung in a zigzag pattern over a 12×16-foot patio creates enough ambient glow for a dinner party while still leaving the sky visible above — which is exactly the mood most people are chasing.
For patios, start by outlining the perimeter: run lights along the top of fence posts, the edge of the deck railing, or the beams of a pergola. For open patios without overhead structure, screw cup hooks into the top of 4×4 wooden posts (set in ground stakes or weighted planters) and span the lights between them. Space posts no more than 10 to 12 feet apart to prevent significant sag in the middle of the run.
The DOE supports automatic schedule controls for exterior ambient lighting — a programmable timer that dims or shuts off your patio lights after a preset hour is a practical application of that guidance and keeps your overnight electricity draw low.
Pro Tip: Warm white LEDs in the 2200K–2700K range read as "Edison bulb" warm and photograph well at parties. Avoid daylight (5000K+) string lights for entertaining — they make skin tones look washed out and the space feel institutional.
Task lighting near grills, dining tables, and serving stations
Ambient string lights alone won't give you enough light to safely flip burgers or read a bottle label at the serving station. Task lighting fills that gap with focused output aimed at a specific surface, rather than spreading soft light across the whole yard.
The distinction matters practically: a string light 8 feet overhead might deliver 10–20 foot-candles at table level — fine for conversation, not sufficient for cooking. A dedicated outdoor-rated pendant or wall-mount lantern positioned 18 to 24 inches above the grill side shelf, or a clip-on task light rated for outdoor use, brings that number up where it's actually useful. If you work with an outdoor lighting affiliate, this is the section to point readers toward one well-chosen pendant, clip-on fixture, or weatherproof bulb line that fits the exact task zone instead of overbuying fixtures.
For dining tables, a hanging outdoor pendant (if your structure allows) or a battery-powered tabletop lamp centered on the table gives guests enough light to see their plates without washing out the mood created by the string lights overhead. Keep task lighting on a separate circuit or outlet from your ambient lights so you can turn off the task zone once dinner is done and stay in party-atmosphere mode.
Watch Out: If you're adding a dedicated outdoor-rated pendant or wired fixture near a grill, the DOE notes that dimming requires a compatible dimmable LED driver. Check that your bulb and any dimmer you add are rated to work together — mismatched equipment produces flicker and early burnout.
Path lighting for walkways, steps, and transitions
Zone 3 is where injuries happen and where most inspiration posts completely ignore the practical details. Low-voltage path lights placed along walkways and stair edges tell guests where the ground changes — and that information is what prevents twisted ankles at 9 p.m.
Any corded or temporarily placed path fixtures must use outdoor-rated cords. OSHA's standard 1926.405 specifies that flexible cords used with temporary and portable lights must be designed for hard or extra-hard usage — not the thin, light-duty extension cords sold in hardware store bins for indoor use. If you're running a cord from an outdoor outlet to a set of portable path fixtures for a party, use a heavy-duty, outdoor-rated extension cord explicitly marked for exterior use.
For permanent or semi-permanent low-voltage path lights, skip extension cords entirely and wire them through a low-voltage landscape transformer connected to a GFCI outlet.
How to plan string lights for the right amount of ambient glow
The most common string-light mistake is buying a single strand, stringing it in one straight line, and wondering why the patio still feels dark. The amount of glow you get depends on three variables: the number of runs, the spacing between them, and the height at which they hang.
A useful starting rule: one straight run of string lights illuminates roughly the width of one run's path. To cover a dining area, you typically need either multiple parallel runs spaced 3 to 4 feet apart, or a zigzag pattern that crisscrosses the space. Budget 1.5× the square footage of your patio (in linear feet of lights) as a starting estimate for adequate overhead coverage.
The Lutron Caséta Outdoor Smart Plug (PD-15OUT-BL) plugs into a standard outdoor outlet and lets you schedule, dim, and control string lights from an app or voice assistant; Lutron says it is built to withstand severe weather, season after season, and is ideal for smart control of landscape and string lighting.
Choose the hanging pattern: straight runs, zigzags, or canopies
| Pattern | Best for | Coverage | Effort |
|---|---|---|---|
| Straight runs | Narrow pergolas, fence lines | Linear — one zone per run | Low |
| Zigzag | Open patios, decks without beams | Wide — covers the full footprint | Medium |
| Canopy (grid) | Dining areas, open lawns | Dense, even overhead glow | High |
Straight runs work well on pergolas where you're simply draping lights across the top beams. Run them perpendicular to the longest beam, spacing each strand 18 to 24 inches apart for even coverage.
Zigzag patterns are the classic backyard look: anchor one end to a corner post or fence, then angle across to the opposite side, zigzagging back and forth. This pattern requires fewer anchor points than a grid and creates a festive, asymmetrical ceiling of light over an open patio.
Canopy grids mean running parallel strands in one direction and crossing them with strands running perpendicular, creating a tight overhead lattice. This is the most labor-intensive and uses the most light — it works best for a permanent pergola structure with dedicated hooks already installed, or for a large lawn dining area that needs consistent illumination.
For narrow side yards or a single walkway with overhead lighting, one straight run centered over the path is enough.
Check power access, extension cords, and timer placement
Before you hang a single strand, answer four questions:
- Where is your nearest outdoor outlet? GFCI outlets (the ones with "Test" and "Reset" buttons) are required for outdoor circuits in US homes built or rewired to modern code. If your patio doesn't have one, you'll need an electrician to add it before you run any permanent lights.
- How far is the outlet from your anchor point? Measure the actual cord run — not a straight-line guess — to know what length of outdoor-rated extension cord you need. Add 10% for slack and routing around corners.
- Where will you mount the timer or smart plug? The DOE Exterior Lighting Control Guidance says that "automatic controls can provide several major benefits to owners of exterior and parking structure lighting systems, including substantial energy and maintenance cost savings." It also identifies photocells and photosensors as exterior-use devices that should be placed with an unobstructed view of the sky so they can read dusk accurately. If you mount a photocell timer inside a covered porch or under a dense pergola roof, it may not read correctly — mount it where it can see open sky, or use a programmable mechanical timer instead.
- Do you want dimming? Standard mechanical outlet timers don't dim; they switch. If you want the option to lower brightness for late-evening ambiance, you need a dimmable smart plug like the Lutron Caséta Outdoor Smart Plug paired with LED string lights that support dimming.
Pro Tip: Run your extension cord along the base of the fence or deck railing rather than across open lawn, and secure it with outdoor cord clips. This protects the cord and keeps guests from tripping on it.
Outdoor-rated string lights and cords to prioritize
Always buy string lights that carry UL-listed certification for outdoor use — that marking means the fixture has been independently tested for the moisture, UV, and temperature exposure it will see in an exterior environment. The UL listing will specify "Wet Location" or "Damp Location" on the packaging. For fully exposed patios and decks, prioritize Wet Location ratings over Damp Location. For a primary source on those markings, check the UL Solutions guide to marked locations and outdoor-use equipment.
LED string lights last significantly longer than incandescent in outdoor conditions — the bulbs themselves don't heat up as much, which reduces thermal stress on the socket connections through repeated freeze-thaw cycles. Edison-style LED bulbs in globe or ST64 shapes are widely available at home improvement stores and online in the $25–$80 range for a 48-foot strand, depending on bulb size and strand quality.
Are solar-powered string lights a good choice? For short runs in very sunny locations, solar string lights can work — but they have real limitations. Most solar strands top out at 25 to 33 feet, deliver less brightness than plug-in LED strands, and require the solar panel to sit in direct sunlight for 6 to 8 hours to run 6 to 8 hours at night. If your patio sits in afternoon shade, or if you need consistent brightness for dinner parties rather than ambient flicker, a plug-in LED strand wired to a GFCI outlet and a timer is the more reliable choice.
Watch Out: OSHA's hard-or-extra-hard usage requirement for outdoor cords means lightweight indoor cords sold for holiday decorating are not appropriate for outdoor permanent or semi-permanent runs. Choose cords rated for the job and long enough to keep connections out of splash zones and walking paths.
How to place path lights for safer circulation
Path lighting's job is narrow and non-negotiable: it tells guests where the ground is. Overlit paths with fixtures spaced too close together create glare hot spots that actually make it harder to see transitions. Fixtures spaced too far apart leave dark gaps at exactly the spots — steps, turns, changes in surface material — where guests are most likely to trip.
The right approach is a highlight-the-hazard strategy: concentrate fixtures at transitions and space them loosely along flat, even stretches. You don't need a fixture every 3 feet along a straight, level concrete walk. You do need a fixture at the top of every step, at every 90-degree turn, and wherever the walking surface changes from pavers to grass.
[Image: Overhead plan view — path light placement on a 20-foot walkway with one stair landing and a 90-degree turn]
Low-voltage path lights powered through a landscape transformer are the standard permanent solution. Solar path lights are a legitimate option for areas far from power but come with the same limitation as solar string lights: they depend on daily sun charging, and many affordable models dim significantly after a few hours. For a primary entertaining walkway that needs to be reliably bright from 7 p.m. to midnight, low-voltage wired fixtures are the dependable choice.
Space path lights so guests can see changes in elevation
A practical spacing sequence for a typical backyard walkway:
- Entry point (gate, door, or driveway edge): place one fixture within 2 feet of the start of the path so guests can find the transition from parking or street level.
- Each stair tread or landing: one fixture at the base of each step change, aimed to wash light across the tread surface rather than pointing up at the face. Low, side-mounted fixtures that cast light downward work better here than upright stake lights that point the bulb into walkers' eyes.
- Every turn: one fixture at the apex of each turn so the direction of the path is clear in the dark.
- Straight stretches: one fixture every 8 to 10 feet is sufficient on a level, even surface. Narrower paths (under 3 feet wide) can stretch to 12 feet between fixtures if the path surface is a single consistent material.
- Destination point (patio edge, seating area, back door): one fixture that marks where the walk ends and the patio begins.
If any of your path fixtures use corded or temporary portable connections, OSHA 1926.405 requires those cords to be rated for hard or extra-hard usage — a constraint worth repeating because it's the most commonly ignored safety detail in temporary backyard setups.
Avoid glare with shielded fixtures and lower mounting height
A glare-control checklist for path lights:
- Choose shielded fixtures: The fixture head should have a cap, hood, or shroud that blocks the bulb from direct line-of-sight at standing height. You should see the light on the ground, not the source itself.
- Mount low: Standard path light stakes place fixtures 12 to 18 inches above grade. That's the right range. Tall fixtures that bring the bulb up to knee or hip height push glare directly into the visual field of anyone walking by.
- Aim down, not out: Adjustable fixture heads should be tilted to cast light downward onto the path surface, not angled forward toward oncoming guests.
- Use warm color temperatures: 2700K to 3000K for path lights keeps them visually consistent with patio string lights and avoids the harsh, cold appearance of daylight-range LEDs.
- Match fixture finishes: Bronze, matte black, and dark-bronze finishes recede into landscaping after dark. Bright chrome or polished finishes catch light and draw the eye to the fixture itself rather than the lit surface.
The DOE's guidance on exterior lighting specifically recommends control zoning plus dimming and scheduling to avoid blanket overlighting — and dimming requires compatible equipment. That applies to paths too: a path light set to 50% output on a quiet weeknight is still fully functional for safety while being far less intrusive to neighbors and the surrounding dark sky.
How to use lanterns for flexible backyard warmth
Lanterns answer the question: how do you add warm light where you can't run a cord and don't want to drive a stake? They're portable, repositionable, and require zero installation — which makes them the right answer for renters, for spaces that rearrange seasonally, and for adding accent light exactly where the conversation cluster lands tonight.
Place lanterns at three scales: tabletop (on dining tables, side tables, and bar carts), floor level (in corners of seating areas, along low walls, on steps that don't need safety-level brightness), and hanging (from shepherd's hooks, pergola corners, or tree branches for overhead accent that isn't a string light run).
Battery-operated lanterns with a warm LED flame effect are the most practical for entertaining — no fire risk, no wax mess, and you can leave them on all night without monitoring. Tabletop lanterns from retailers like Pottery Barn, Crate & Barrel, and World Market typically range from $30 to $120 and are available in rattan, metal, and glass styles that work across most outdoor aesthetics.
Battery, solar, and candle lanterns: when each works best
| Lantern type | Best situation | Trade-offs |
|---|---|---|
| Battery-operated (LED) | Frequent entertaining, renters, any location | Need battery replacement or recharging; consistent output |
| Solar accent | Sunny gardens, low-use areas, set-it-and-forget-it | Output varies with charge; not reliable for regular parties |
| Real candle | Occasional use, wind-protected spots, intimate dinner | Requires supervision; open flame near fabric or wood is a hazard |
| Battery-operated lanterns are the right call for regular entertainers. Models with a timer function (many now include 4-hour or 6-hour auto-shutoff) mean you don't have to remember to turn them off when you go inside. Brands like Threshold (Target's outdoor line) and Hampton Bay (Home Depot) offer weather-resistant battery lanterns in the $20–$60 range. |
Solar accent lanterns work well as garden-edge accents in areas that get direct afternoon sun — think along a sunny fence line or in a raised garden bed border. They're not reliable enough for your main dining table on a party night. Think of them as supplementary mood accents in the landscape rather than functional entertainment lighting.
Real candle lanterns are hard to beat for intimacy and visual warmth — but keep them on stable surfaces well away from overhanging fabric, wood fencing, or dry plants, and never leave them unattended.
Layer lanterns with string lights and path lighting
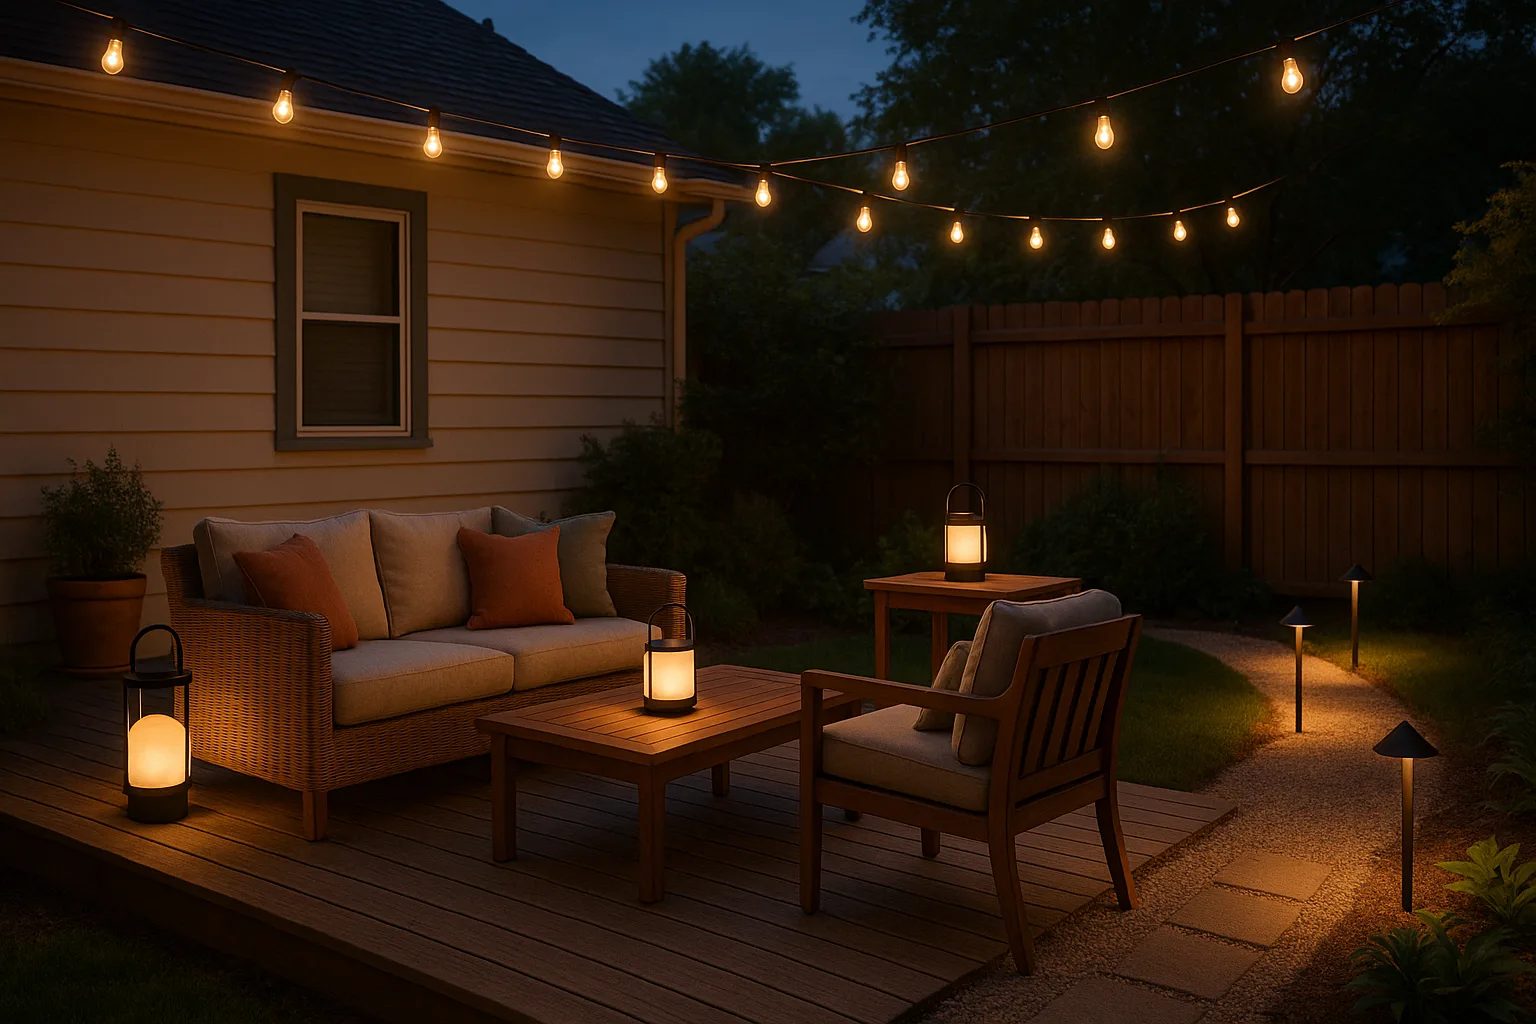
A finished backyard entertaining space has three distinct light levels working simultaneously: string lights overhead creating a warm ceiling, path lights at ground level defining safe circulation, and lanterns at eye level and tabletop height filling the middle zone with concentrated warmth.
A sample layered layout for a 14×20-foot patio with an adjacent walkway:
- Overhead: Two zigzag runs of 48-foot LED Edison string lights spanning the patio from fence to pergola post, plugged into a GFCI outlet with a photocell timer
- Grill zone task light: One outdoor-rated clip-on LED task light clamped to the side shelf of the grill, on its own outlet
- Dining table: Two medium glass lanterns with battery-operated LED candles, centered on the table
- Seating corner: One large floor lantern (18–24 inches tall) placed in the corner of the lounge area to anchor the space
- Walkway: Six low-voltage stake path lights spaced at entry, two turns, and the patio's edge
The DOE's guidance on exterior lighting control supports running these as separate zones — the string lights and path lights can be on a photocell or timer, while the lanterns are simply switched on manually when guests arrive and off when they leave. That separation means you're not fighting a single switch for three different lighting moods.
When smart outdoor lighting is worth it
Smart outdoor lighting earns its cost if you entertain frequently, dislike fiddling with switches and timers, or want to gradually dim your patio lights as a party winds down at 10 p.m. without getting up from your chair. If you use your backyard a few times a summer, a $12 mechanical outlet timer is all you need.
The Lutron Caséta system is one of the most practically useful smart lighting platforms for outdoor entertaining because it extends the same dimmers, switches, remotes, sensors, and smart bridge it uses indoors to weatherproof outdoor fixtures. Per Lutron's smart landscape lighting brochure, the Caséta family lets you "mix, match, add, and remove devices to create a smart solution for landscape lighting" — which means you can start with one outdoor smart plug for your string lights and expand later to path light control without replacing your hub.
A smart-control decision checklist:
- You entertain 2+ times per month → Smart controls pay off in convenience and energy savings
- You want string lights to turn on automatically at dusk → Photocell-triggered smart plug or a smart hub with a sunset schedule
- You want to dim lights for late-evening mood → Smart dimmer outlet required; verify your LED string lights support dimming
- You have multiple zones (patio + path + lounge) → A smart hub like Lutron's Smart Bridge lets you control all zones from one app
- You use the backyard occasionally → A mechanical outlet timer ($12–$25 at Home Depot) is sufficient; skip the smart ecosystem
Which controls matter most: dimmers, schedules, or app control
For most outdoor entertaining setups, a schedule is the highest-value control feature. Lights that come on automatically at dusk and off at a preset time eliminate the most common complaint: forgetting to turn them off. According to DOE exterior lighting guidance, automatic controls can turn lights off or down when they are not needed, and the main control strategies include automatic shutoff, scheduled reduction, daylight sensors, and dimming.
A simple decision tree:
- Plug-in string lights + occasional use → Mechanical outlet timer with a 6-hour duration setting for automatic shutoff
- Plug-in string lights + frequent entertaining → Lutron Caséta Outdoor Smart Plug (PD-15OUT-BL) with app scheduling and dimming
- Multiple outdoor zones + whole-home smart system → Lutron Caséta Smart Bridge + multiple outdoor smart plugs, integrated with Alexa, Google Home, or Apple HomeKit
- Path lights + landscape transformer → Transformer with a built-in digital timer and photocell for daylight sensing; no smart hub required for basic scheduling
Note that dimming requires a compatible dimmable LED driver in both the fixture and the control device. Not all LED string lights support dimming — check the product spec before buying a dimmable smart plug.
Low-voltage transformer planning for path and landscape lighting
If you're installing wired low-voltage path lights rather than solar, you'll power them through a low-voltage transformer that steps down standard 120V AC power to 12V AC. The transformer plugs into a GFCI outdoor outlet and has a lead wire that runs to your fixture run.
The critical planning step is totaling the wattage of every fixture you intend to connect and choosing a transformer rated by the manufacturer for that total. Follow the transformer documentation for load limits, wire gauge, and maximum run length rather than applying a generic percentage rule.
Watch Out: Transformer sizing and wire run length interact — longer wire runs increase voltage drop, which can dim fixtures at the far end of the run even when the transformer is properly sized. Consult the manufacturer's documentation for the specific transformer and wire gauge you're using before finalizing your layout. The DOE notes that low-voltage relay panels and communication systems are common exterior-lighting infrastructure, but specific sizing figures must come from manufacturer documentation rather than generic guidelines.
Common backyard lighting mistakes to avoid
The mistakes that inspection-driven and inspiration-focused articles skip are exactly the ones that create dark spots, safety hazards, and frustration after the first heavy rain.
Mistake-and-fix checklist:
- Dark gaps on the path → Fix: add fixtures at every elevation change and 90-degree turn, even if it means more fixtures than you planned for
- Overlit dining table with harsh downlighting → Fix: replace a bright overhead flood with a warm-white pendant or rely on string lights overhead plus a tabletop lantern for table-level warmth
- Light-duty extension cords run outdoors → Fix: replace with cords rated for outdoor or hard usage per OSHA's requirement for temporary and portable lights; use only cords sized for the load and approved for exterior use
- Mixed color temperatures across fixture types → Fix: buy all fixtures from the same color temperature range — 2700K to 3000K across strings, path lights, and lanterns creates visual cohesion; mixing 2700K strings with 5000K path lights looks broken
- String lights hung too high with no anchor points → Fix: add intermediate posts or hooks so no span exceeds 12 feet; unsupported spans sag and eventually pull the socket connections loose
- Timer or photocell mounted under dense cover → Fix: mount photocells where they have an unobstructed view of the sky, per DOE exterior lighting guidance; covered mounting locations cause photocells to read incorrect light levels
Why too many bright fixtures make entertaining spaces feel harsh
Before: A patio with eight recessed LED floodlights in the overhead structure, all at 100% output in 5000K daylight white. Every face at the dinner table is lit from above like an interrogation scene. The yard beyond the patio edge disappears into absolute black because the eye has adjusted to the bright foreground.
After: The same patio with two zigzag runs of 2700K LED string lights at 60% output (on a dimmable smart plug), two tabletop lanterns on the dining table, and four low-voltage path lights marking the walkway edge. The dining area glows warmly, the path is clearly visible, and the garden beyond reads as a soft dark backdrop rather than a void.
The DOE frames this well: exterior lighting controls exist to use "light only when needed and in the quantity needed." More lumens don't equal better ambiance — even coverage at a lower output level does. A 60-watt-equivalent string light at 2700K produces enough light to socialize by while maintaining the relaxed warmth that makes outdoor entertaining feel different from sitting inside under recessed cans.
Why outdoor rating and covered storage matter in US climates
Weather exposure kills lighting faster than age. In climates with humid summers and freezing winters — most of the continental US — a fixture or cord that isn't rated for outdoor exposure will fail within one or two seasons. Insulation on light-duty cords cracks in below-freezing temperatures. Socket connections corrode in humid Gulf Coast and Pacific Northwest conditions. Plastics UV-degrade in high-altitude or desert sun.
UL-listed outdoor fixtures carry a Wet Location or Damp Location rating on the packaging. Wet Location means the fixture can be directly exposed to rain, irrigation spray, or condensation. Damp Location means it can handle humidity and condensation but shouldn't be directly rained on. For any fixture that sits fully exposed on a deck or in the yard, choose Wet Location.
The Lutron Caséta Outdoor Smart Plug is described by Lutron as "built to withstand severe weather, season after season" — a useful benchmark for what a properly outdoor-rated control device looks like.
For seasonal climates (Midwest, Northeast, Mountain West), bring in battery lanterns, unplug and coil string lights, and store them in a dry garage or basement between November and March. Even outdoor-rated fixtures last longer when they're not exposed to ice expansion inside socket connections during freeze-thaw cycles. Path lights with metal stakes can stay in the ground if the fixtures themselves are rated for wet/outdoor use, but disconnect and store any corded accessories.
A simple backyard lighting plan you can copy
The DOE's guidance on exterior lighting supports separating ambient, task, and circulation lighting into distinct control zones — and the following plans follow that structure exactly. Pick the scale that matches your space.
Small patio layout with dining, grill, and one walkway
Space: 12×14-foot concrete patio, one gas grill to the side, one 18-foot concrete walkway from the back gate to the patio.
| Zone | Fixture | Placement | Control |
|---|---|---|---|
| Overhead ambient | 48-ft LED Edison string lights (one zigzag run) | Post-to-fence across patio, 8 ft high | Outlet timer (dusk–11 p.m.) |
| Grill task | Outdoor-rated clip-on LED task light | Clipped to grill side shelf | Manual switch |
| Walkway | 4 low-voltage stake path lights | Entry, mid-turn, stair top, patio edge | Transformer timer |
| Dining table | 2 battery LED tabletop lanterns | Table center | Manual (4-hr auto-shutoff) |
Total outlets needed: one GFCI outdoor outlet for string lights + task light (separate plugs), one GFCI for transformer. If you only have one outdoor outlet, add an outdoor-rated power strip rated for the combined wattage.
Any extension cords used in this setup must be rated for outdoor hard usage. Run them along fence base or deck edge, secured with outdoor cord clips.
Larger backyard layout with lounge seating and garden edges
Space: 20×24-foot paver patio, attached pergola over the dining area, a separate lounge cluster on grass 15 feet from the patio, and a 30-foot garden bed border along the back fence.
- Dining zone (under pergola): Three parallel runs of 48-ft 2700K LED string lights draped across pergola beams, 9 feet overhead. Controlled via Lutron Caséta Outdoor Smart Plug set to a sunset schedule with 10 p.m. dim-to-off.
- Lounge zone: Two shepherd's hooks with hanging battery lanterns at the seating cluster perimeter. Three tabletop lanterns on the side table and coffee table. No hardwiring needed.
- Garden edge: Six solar path lights spaced along the garden bed border. These work as accent/marker lights rather than primary safety lighting; morning sun charges them adequately along a south-facing fence.
- Primary walkway: Eight low-voltage path lights on a single transformer run: entry, every turn, and the transition from lawn to pavers. On a transformer with a built-in photocell and timer.
- Grill station: One outdoor-rated pendant on a shepherd's hook arm positioned over the grill, on its own outlet.
Smart controls through Lutron Caséta let you control the pergola string lights and any additional smart plugs from a single app, with the option to add voice control through Alexa or Google Home. The system's ability to mix and match devices means you can start with one smart plug and expand without replacing the hub.
Backyard entertaining lighting FAQ
What are the best outdoor lighting options for a backyard?
The best combination for most backyards is LED string lights for overhead ambient atmosphere, low-voltage path lights for safe guest circulation, and battery or solar lanterns for flexible tabletop and accent warmth. These three types address different functional needs and layer together without creating harsh overlighting. For control, add a photocell timer or a smart plug like the Lutron Caséta Outdoor Smart Plug to automate your string lights so they come on at dusk without manual switching.
How do you hang outdoor string lights for maximum ambiance?
Mount anchor points (cup hooks, eye bolts, or strand clips) on fence posts, deck rails, pergola beams, or freestanding wooden posts spaced no more than 10 to 12 feet apart to prevent sag. Use a zigzag pattern across the patio for even coverage rather than a single straight run. Hang lights at 8 to 10 feet above grade — high enough to clear seated and standing guests, low enough to feel intimate. Choose 2700K warm white LED bulbs, and keep the total run plugged into a GFCI outdoor outlet with a timer or smart plug.
Are solar-powered string lights a good choice for outdoor lighting?
Solar string lights are a reasonable option for low-traffic accent lighting in locations with consistent afternoon sun, but they're not reliable for regular entertaining. Most max out at 25 to 33 feet, require 6 to 8 hours of direct sun to run through a full evening, and dim significantly in shaded yards or after cloudy days. For a patio you use regularly for dinner parties, plug-in LED string lights wired to a GFCI outlet deliver consistent, bright output regardless of the previous day's weather. Solar path lights work better as garden-edge accents than as primary walkway safety fixtures.
How do you light a backyard without anchored fixtures?
Battery-operated and solar lanterns require zero installation — no stakes, no cords, no outlet access. Place battery LED lanterns on dining and side tables, in seating-area corners, and on steps. Hang solar lanterns from shepherd's hooks pushed into lawn or planting bed. Use solar path lights (stake-driven but cord-free) along walkways. This all-portable approach works for renters, for irregular entertaining spaces, and for anyone who rearranges furniture seasonally. The trade-off is that output is lower and less consistent than wired fixtures.
What is the best way to light a patio for entertaining?
Layer three fixture types: string lights overhead for ambient atmosphere, a task light near the grill or serving station for usable work light, and lanterns at table and floor level for warmth and flexibility. Keep all fixtures in the same color temperature range (2700K to 3000K) so the overall light reads as cohesive rather than patchwork. Put string lights on a photocell timer so they're on when guests arrive without you having to manage it. Use smart outdoor lighting controls like the Lutron Caséta system if you want to dim the overhead lights as the evening progresses without getting up from the table.
Sources & References
- BHG — Backyard Lighting Ideas — Competitor reference establishing SERP context for backyard lighting inspiration content
- DOE Better Buildings Solution Center — Exterior Lighting Control Guidance — Primary source for outdoor lighting control strategies, photocell guidance, and zoning principles
- OSHA Standard 1926.405 — Wiring Methods, Components, and Equipment for General Use — Source for hard- or extra-hard-usage cord requirements for temporary and portable outdoor lights
- OSHA Standard 1910.334 — Use of Electrical Equipment — Source for cord- and plug-connected equipment standards
- Lutron Caséta Outdoor Smart Plug Product Page (PD-15OUT-BL) — Product documentation for weatherproof smart plug compatible with string and landscape lighting
- Lutron Caséta System Overview — Source for Caséta smart home lighting control system capabilities
- Lutron Smart Landscaping Solutions Brochure — Source for Caséta landscape lighting device mixing and matching guidance
Keywords: UL-listed, outdoor-rated cord, LED string lights, low-voltage path lights, solar path lights, battery-operated lanterns, tabletop lanterns, GFCI outlet, photocell timer, smart outdoor lighting, Lutron Caseta, low-voltage transformer, weatherproof rating, Edison bulb string lights