Pool pump not priming: the fastest likely fix and what priming means
At a Glance: Most no-prime calls are fixed in under 20 minutes with a water-level check, a basket clear, or a $5–15 lid O-ring swap — not a service call.
Your pump isn't priming because air is getting into the suction side faster than the pump can push it out. That's the core of almost every priming failure, and it helps to understand what "priming" actually means before you start opening things up.
Priming means removing all the air from the pump and suction lines so the pump basket fills completely with water and the system returns steady pressure at the return jets. Per Leslie's Pool Supplies' priming guide, a properly primed pump has no air pockets between the skimmer and the impeller — water fills the entire suction path and the pump can do its job. When air breaks that water column, the pump spins but moves nothing useful, the basket stays dry or half-full, and pressure at the filter gauge stays low or drops to zero.
DIY vs Pro: If the pump won't hold prime because of a dry O-ring, low water, or clogged basket, that's a DIY fix you can complete before lunch. If the pump hums but won't start, trips a breaker, or smells like burning plastic, stop there — those symptoms point to electrical or motor faults. As Leslie's troubleshooting guide states: "If current is in doubt, contact a licensed electrician."
Work through the seven causes below in order. The list is ranked by how often each cause is actually responsible for a no-prime situation, with the cheapest and easiest fixes first.
7 likely causes of a pool pump not priming, ordered by probability
Pentair's OptiFlo troubleshooting documentation and Leslie's pump troubleshooting guide together cover nearly every priming failure a homeowner will encounter. These seven causes account for the overwhelming majority of them — and they're ordered here the way you should check them, not alphabetically or by severity. That probability-ordered list also points you toward the most common pool equipment parts first, so you can avoid buying the wrong fix before you know what failed.
| Priority | Cause | Typical Fix | DIY or Pro? |
|---|---|---|---|
| 1 | Water level below skimmer | Add water | DIY |
| 2 | Clogged skimmer or pump basket | Clear debris | DIY |
| 3 | Worn or dry lid O-ring / loose lid | Replace O-ring, reseat lid | DIY |
| 4 | Air leak at unions, valves, or fittings | Inspect and reseal | DIY / Pro if hidden |
| 5 | Leaking drain plugs or housing seals | Replace O-rings | DIY |
| 6 | Blocked impeller | Remove debris carefully | DIY with caution |
| 7 | Bad capacitor, motor fault, or wiring issue | Electrical diagnosis | Licensed Pro |
The pool equipment parts involved in causes 1–6 are widely stocked at Leslie's Pool Supplies, Pinch A Penny, and In The Swim. A full set of replacement O-rings — lid O-ring, drain-plug O-rings, union O-rings — typically runs $10–40 depending on your pump brand and model.
Low water level and evaporation in Sun Belt pools
Low water is the single most embarrassing cause of a non-priming pump, and it's also the most common — especially in Florida, Texas, Arizona, and Southern California, where heat, wind, and dry air can pull a pool down fast enough to expose the skimmer between checks. A pool that looked fine on Monday morning can be running the skimmer half-dry by Thursday afternoon without a noticeable visual drop from the deck.
As Pentair's OptiFlo troubleshooting guide states directly: "Water level is below skimmer. Adjust pool water level." That's the first check — not the O-ring, not the basket — the water level.
For the skimmer to draw water consistently, the pool surface needs to sit roughly at the middle of the skimmer opening, or at minimum one-third up from the bottom of the skimmer throat. Any lower and the skimmer gulps air with every wave.
Pro Tip: If you're in Phoenix, Las Vegas, or inland Southern California and your pump loses prime every few days during summer, check your water level before anything else each time. Heat and low humidity accelerate evaporation dramatically. Running a hose for 15–20 minutes after a hot weekend is often all that separates a working pump from a Sunday-morning panic.
[Image: Pool skimmer with water level at mid-opening — correct level vs. low level comparison]
Pass/Fail checkpoint: Water at or above the midpoint of the skimmer opening → pass. Skimmer opening partially or fully exposed → add water before doing anything else.
Clogged skimmer basket or pump basket
A jammed basket is a pressure blockage. The pump motor spins, but the impeller can't move enough water through the restriction to fill the suction line and displace air. The result looks exactly like a prime failure — because functionally, it is one.
Per Pentair's guidance: "Strainer basket or skimmer basket is clogged. Clear basket." That's the full instruction, because the fix really is that direct.
Step card — clearing both baskets safely:
- Shut off power to the pump at the breaker or timer before touching anything. Don't just press the off button on the controller — cut power at the source.
- Walk to the skimmer at the pool wall and lift the lid. Remove the skimmer basket and shake it clean over a trash can or a bucket. If it's slimy, rinse it with a hose.
- Walk to the pump. Open the clear pump lid (counterclockwise on most Pentair and Hayward pumps). Lift out the strainer basket.
- Clear all debris — leaves, acorns, insects, algae clumps. Rinse with a hose if needed.
- Before reinstalling the pump basket, fill the pump pot with water from a hose. This gives the pump a head start and speeds re-priming.
- Reinstall the basket, reseat the lid O-ring (see next section), and close the lid firmly.
- Restore power and watch the clear lid. Water should begin rising into the basket within 60–90 seconds on most residential pumps.
Watch Out: Never run the pump dry. If you've cleared the baskets and refilled the pot but still don't see water rising after 2–3 minutes, shut off the pump and move to the next diagnostic step rather than letting the motor spin dry against air.
Worn lid O-ring, loose pump lid, or cracked lid
Yes — a bad O-ring absolutely can stop a pump from priming, and it's one of the most common causes of a pump that primes fine for a few days and then loses prime again. The pump lid O-ring (also called the strainer lid O-ring) creates the airtight seal between the clear lid and the pump pot. When it dries out, flattens, stretches, or gets pinched during reinstallation, it lets air seep in on the suction side. The pump never fully displaces that air, so it never fully primes.
Per Pentair's troubleshooting documentation, the fix is straightforward: "Replace O-ring."
How to inspect the lid O-ring:
- Remove the lid and lift the O-ring out of its groove.
- Hold it in good light. Look for flat spots, cracks, brittleness, or uneven texture. Even if it looks intact, squeeze it — a healthy O-ring is supple and springy. A dead one feels stiff or crumbles slightly at the edges.
- Check the groove itself. Old lubricant, grit, or algae buildup in the groove can prevent a good seal even with a new O-ring.
- Clean the groove with a damp cloth before installing a replacement.
A replacement lid O-ring for a Pentair OptiFlo, Hayward MaxFlo, or similar residential pump should be matched to the exact model at Leslie's Pool Supplies or Pinch A Penny. Bring the old ring or your pump model number — they're not all interchangeable. After installing the new O-ring, apply a thin coat of silicone pool lubricant (not petroleum-based Vaseline, which degrades rubber) before seating the lid.
DIY vs Pro: A dry or worn O-ring is a straightforward DIY fix. A cracked pump lid is a different situation — cracks in the lid itself allow air in regardless of how good the O-ring is, and no amount of lubricant seals a cracked plastic lid. If you find cracks in the lid, order a replacement lid matched to your exact pump model. If the housing below the lid is cracked, that's a pro-level repair or pump replacement conversation.
Pentair's OptiFlo pumps feature an "innovative Cam and Ramp lid" that locks with a quarter-turn, which makes proper seating easier — but it also means an improperly seated lid looks closed while still leaking. Always confirm the lid has completed its full rotation and seated flush before running the pump.
Air leaks at unions, valves, fittings, and suction-side plumbing
Suction-side air leaks are sneaky. Unlike pressure-side leaks (which spray water and announce themselves), suction-side leaks pull air inward — so the pipe looks dry and fine from the outside while it feeds air bubbles directly into the pump. Repeated prime loss after you've confirmed the water level, cleared the baskets, and replaced the lid O-ring is the signature of a suction-side air leak.
Per Pentair's OptiFlo troubleshooting guide: "Air leak in suction line. Find and fix leak." Air bubbles returning through the pool's jets while the pump is running is another giveaway — Pentair's filter documentation notes that bubbles in return lines signal either low water level or damaged/leaking suction-side components.
Leak-check sequence for suction-side plumbing:
- Start at the pump suction inlet. Look at the union fitting where the suction pipe connects to the pump — this is one of the most common leak points. Grasp it firmly and try to twist it. If it moves, it's loose.
- Inspect the union O-ring. Unscrew the union collar and check the O-ring inside it. Sun exposure and age dry these out the same way the lid O-ring deteriorates.
- Move to any ball valves or gate valves on the suction line. Check the area around the valve stem and body for residue or fine cracks.
- Trace the suction line back toward the skimmer. Check every glued joint within visible reach for hairline cracks.
- Look for discoloration or calcium deposits around any fitting — these calcium rings sometimes form where water occasionally seeps out and evaporates, revealing a slow leak point.
DIY vs Pro: If you find a leaking union O-ring or a loose union collar, replacing it is a straightforward DIY repair — swap the O-ring, reassemble finger-tight plus a quarter turn, done. If the leak is at a glued PVC fitting, a buried line, or anywhere you can't see clearly, that's pool service territory. Underground plumbing repairs require excavation and PVC expertise. Don't guess at buried leak locations; a pool tech with a pressure-test kit can isolate the section within an hour.
Drain plugs, housing seals, and other small suction-side leaks
After a winter closedown, a freeze event, or even a routine pool equipment parts swap, the drain plugs in your pump housing and filter are the first things to go wrong. These are the threaded plugs at the base of the pump pot and filter housing — typically 1/4" or 3/8" threaded plastic with a small rubber O-ring underneath. When that O-ring dries out, cracks, or gets cross-threaded during reinstallation, it allows a steady trickle of air into the suction side.
Leslie's stocks the Pentair drain plug with O-ring for Clean & Clear equipment — a common and inexpensive replacement. Having a set on hand before pool season starts is smart maintenance.
Flashlight inspection protocol:
- Shut off the pump and wait two minutes for pressure to equalize.
- Grab a flashlight and crouch down to pump level. Shine it across the base of the pump pot and around all drain plug locations.
- Look for wet streaks below plugs, white calcium deposits around the threads, or visible gaps between plug and housing.
- Check the seal plate area — the flat plate on the back of the pump pot where the motor attaches. A warped or cracking seal plate is a more serious finding (see the "When to Call a Pro" section).
- Run your finger around each drain plug and the perimeter of the pump pot. Moisture on your fingertip that shouldn't be there is a leak.
Replace any drain plug O-rings that look flat, cracked, or misshaped. Thread plugs in hand-tight only, then add no more than a quarter turn with pliers — overtightening cracks the housing.
Impeller blockage or debris in the pump housing
The impeller is the spinning disk inside the pump that actually moves water. When a leaf fragment, a piece of plastic, a small stone, or other debris gets past the basket and lodges in the impeller vanes, it can partially or fully block water flow. The motor still runs — you'll hear it — but the pump can't build suction. This often looks like a stubborn prime failure that persists even after you've cleaned the baskets, replaced the O-ring, and confirmed the water level.
As Leslie's troubleshooting guide notes, you should inspect the impeller for debris and verify the motor shaft spins freely — because clogged impellers and worn parts can prevent normal operation.
Step-by-step impeller clearing:
- Shut off power at the breaker. Confirm the pump is de-energized before reaching into the pump housing. This is not optional.
- Close the suction and return valves to reduce the chance of water flooding the pump housing when you open it.
- Remove the pump lid and basket as described earlier.
- With a flashlight, look directly into the pump pot toward the impeller opening at the back. You're looking for debris caught in the intake throat.
- Use a long screwdriver or a bent piece of coat hanger to probe gently into the impeller throat and dislodge any obstruction. Do not force it — if debris is deeply embedded, the access route depends on the pump model and manual.
- On many pumps, the impeller access method is model-specific and may require removing the motor and seal plate assembly.
- Once clear, manually spin the impeller by turning it by hand through the throat opening. It should rotate freely with light resistance. If it won't spin at all, that's a motor shaft or bearing issue, not a debris problem — stop and call a pro.
- Reassemble, refill the pot, and test.
Watch Out: If removing debris from the impeller doesn't restore operation, move immediately to the electrical diagnostic branch. Continuing to run a pump that's mechanically compromised can overheat the motor and turn a $50 repair into a $400 motor replacement.
Capacitor, motor, or wiring problems that move the fix into pro territory
A pump that hums steadily but won't start — after you've cleared the impeller of debris and confirmed the shaft spins freely — has moved out of the suction-side world entirely. That hum is the motor trying to start and failing, which points to a bad run capacitor, a motor winding failure, or a wiring fault. None of these are suction-side priming problems, but they show up on the same symptom list because the end result is the same: no water moving.
As Leslie's troubleshooting guide puts it: "If current is in doubt, contact a licensed electrician."
The run capacitor is a cylindrical component mounted on the outside of the motor housing — it provides the electrical kick that starts the motor spinning. When it fails, the motor hums but stays stationary. Capacitor replacement is a real DIY option for someone with electrical experience who purchases an exact model-matched replacement — matching microfarad (µF) rating and voltage rating matters, and substituting a "close enough" capacitor can damage the motor. If you're not experienced with capacitor work, treat it as a pro repair.
When to Call a Pro: Stop DIY troubleshooting and call a licensed pool technician or electrician if you encounter any of these: - The breaker trips when you start the pump - The motor hums but won't start, even after clearing impeller debris - You smell burning plastic or hot insulation near the motor - You find loose, corroded, or unidentified wiring at the motor terminals or timer - The pump repeatedly loses prime within hours of a basic fix - You find cracks in the pump housing itself - The seal plate looks warped or has visible gaps - You're considering a capacitor swap but don't have experience with pool-motor electrical systems
One additional note for California pool owners: Pentair's SuperFlo documentation confirms that, under California Title 20 CCR sections 1601–1609, single-speed pumps and replacement motors of one total horsepower or greater cannot be sold, offered for sale, or installed in a residential pool for filtration use in California. If your motor replacement falls into this category, a licensed California pool professional will know the compliant variable-speed alternatives.
How to diagnose a pool pump that will not prime in the right order
The following sequence combines Pentair's OptiFlo diagnostic path with Leslie's electrical escalation branch into one ordered walkthrough. Work every step before moving to the next — skipping steps wastes time and can lead you toward unnecessary repairs.
Step 1: Check the water level and skimmer weir
Water at or above the midpoint of the skimmer opening is your go/no-go baseline for every other step. If the pool surface has dropped below the skimmer throat, the pump pulls air every time it runs — no other diagnosis matters until the water is at the right level.
[Image: Pool skimmer opening showing correct water level at midpoint vs. low water exposing the full opening]
Pass: Water visible in the upper half of the skimmer opening → move to Step 2. Fail: Skimmer throat partially or fully above water → run a hose until the level rises to the midpoint, then start the pump and watch for 2–3 minutes. If it primes, you're done.
Step 2: Clean the skimmer basket and pump basket
Safety first: shut off power to the pump at the breaker before opening the strainer pot lid. This eliminates any risk of the pump starting while your hands are inside.
Remove and clear the skimmer basket at the pool wall. Then go to the pump, open the lid, and clear the strainer basket. Fill the pump pot with water from a hose before closing the lid — this primes the initial water column and reduces the air volume the pump has to displace. As Pentair's troubleshooting guide directs: "Strainer basket or skimmer basket is clogged. Clear basket."
Restore power, run the pump, and watch the clear lid. Rising water within 60–90 seconds → primed. No movement after 3 minutes → shut off and move to Step 3.
Step 3: Inspect the pump lid O-ring and tighten the lid evenly
Remove the pump lid and pull the O-ring from its groove. Check it for flat spots, cracks, or brittleness. Apply a thin coat of silicone pool lubricant — not Vaseline — to a replacement lid O-ring and seat it cleanly in the groove. Confirm there are no twists or sections popping out of the groove before closing the lid.
On Pentair OptiFlo pumps, the "Cam and Ramp lid" locks with a quarter-turn. Make sure it's fully rotated and seated flush — a lid that appears closed but hasn't completed the full lock cycle will leak continuously. Per Pentair's troubleshooting guidance: "Replace O-ring." Replacement pool equipment parts like lid O-rings are model-specific — bring the old ring or your pump model number to the counter at Leslie's or Pinch A Penny.
Run the pump. If it primes and holds → done. If it primes and then slowly loses prime over minutes → you likely have a suction-side air leak. Move to Step 4.
Step 4: Trace suction-side air leaks at unions, valves, and fittings
Start by checking the suction-side valves. Make sure they are fully open, then close and reopen each one once to confirm the handle is seated correctly and not partially restricting flow. Then move to the threaded coupler where the incoming pipe connects to the pump. Grip and twist the union gently. If it moves at all, tighten it by hand plus a quarter turn. Open the union collar and inspect the O-ring inside: flat, cracked, or missing O-rings here are a frequent culprit. Standard union O-rings for 1.5" and 2" fittings are inexpensive pool equipment parts available at any pool supply store.
Trace the suction pipe back toward the skimmer as far as you can see. Look for calcium deposits (white rings or streaks) at fittings — they signal a slow weep point where water escapes and evaporates.
As Pentair's troubleshooting text puts it: "Air leak in suction line. Find and fix leak."
DIY vs Pro: If you find and fix an obvious union O-ring or loose fitting, run the pump for 10 minutes and confirm it holds prime. If you can't locate the leak, or if the pump still loses prime after fixing visible joints, contact a pool service professional. Buried suction lines require pressure testing to locate a break — that's not DIY territory.
Step 5: Check drain plugs, housing seals, and the pump pot
Shut off the pump. Get a flashlight and get down to pump level. Shine the light across the base of the pump pot and at every drain plug. Look for wet streaks below plugs, calcium deposits at threaded fittings, or moisture on the seal plate. Run your finger around each plug — any dampness that shouldn't be there is a leak.
Replace any suspect drain-plug O-rings. Leslie's stocks the Pentair drain plug with O-ring for Clean & Clear equipment, and similar parts are available for most major pump brands. Thread in hand-tight, then add no more than a quarter turn with pliers. Inspect the seal plate for warping or cracking — if you see either, that's a pro repair.
Replacement pool equipment parts for drain plugs and O-rings are worth keeping in your equipment bag every season.
Step 6: Remove debris from the impeller if the pump still will not prime
Shut off power at the breaker before proceeding. Confirm the pump is fully de-energized.
Close the suction and return valves. Remove the pump lid and basket. With a flashlight, look into the impeller throat at the back of the pump pot. Use a long-handled screwdriver to probe gently for debris. If the obstruction is deeper, check your owner's manual for impeller access — the exact method depends on the pump model.
As Leslie's troubleshooting guide specifies, inspect the impeller for debris and verify the motor shaft spins freely. Once clear, manually rotate the impeller to confirm free movement before reassembly.
If the impeller clears but the pump still won't operate normally, stop. Do not continue forcing mechanical parts. Move to Step 7.
Step 7: Test for capacitor, motor, or wiring problems
If you've completed Steps 1–6 and the pump still won't prime or start correctly, the problem is electrical — not suction-side. Confirm the power is reaching the pump by checking the timer, breaker, and GFCI outlet or breaker. Reset a tripped GFCI once. If it trips again immediately on restart, that's a hard stop — call a licensed electrician.
A humming motor that won't spin after the impeller has been confirmed clear points to a failed run capacitor. Per Leslie's guide, this is in the electrical diagnostic branch and warrants professional involvement unless you have specific experience with pool-motor capacitor replacement. The replacement capacitor must be an exact match for your pump model's microfarad and voltage specifications.
If the breaker trips, the motor hums but won't start, you smell burning insulation, or you find loose, corroded, or unknown wiring at the motor terminals or timer, stop DIY right there and hand the job to a licensed electrician or pool service professional. Repeated prime loss after suction-side repairs have already been addressed is also a handoff point — it means the fault is no longer simple suction-side priming.
When to Call a Pro: A burning smell, breaker trips, loose or unknown wiring at the motor terminals, a motor that won't spin even after clearing the impeller, or repeated prime loss after suction-side repairs have all been addressed — call a pool service pro or licensed electrician now. These symptoms are outside the DIY boundary.
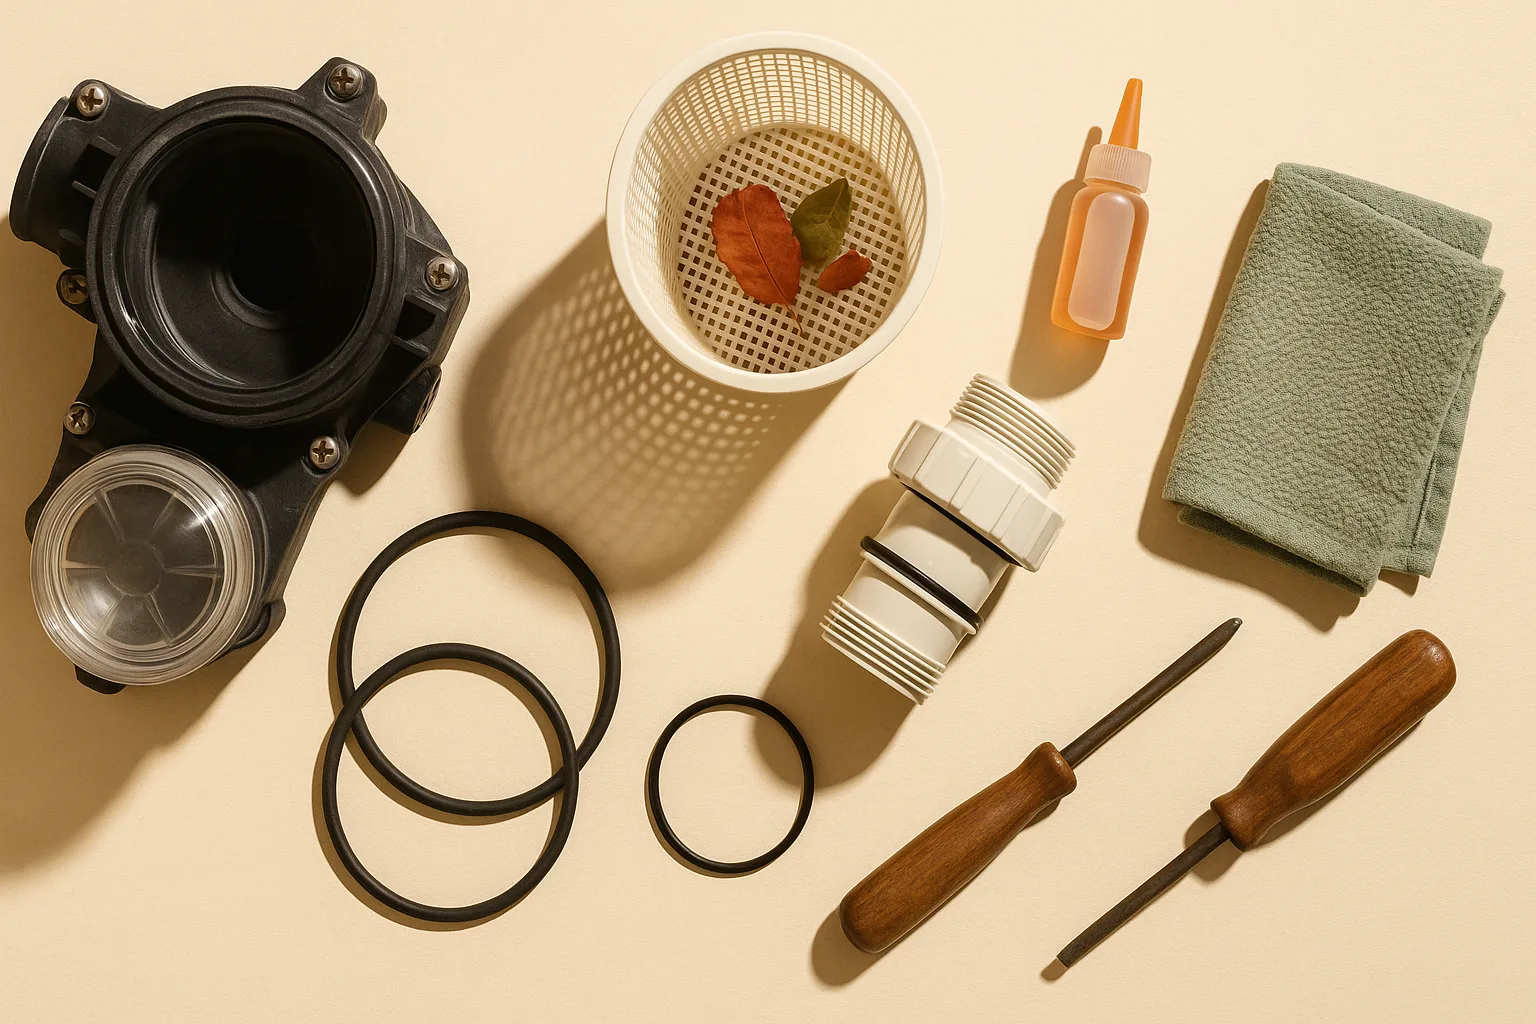
Pool pump tools and parts checklist for priming problems
Gather these before you open the pump. Nothing slows a 15-minute fix like a mid-job run to the hardware store.
Tools: - Phillips-head and flathead screwdrivers (various sizes) - Hex key set (confirm your model) - Flashlight or headlamp - Garden hose with good flow - 5-gallon bucket - Pliers (for drain plugs — padded jaws preferred to avoid cracking plastic)
Replacement parts — buy these before you need them: - Lid O-ring matched to your pump model (Pentair, Hayward, Jandy — they are not interchangeable; $5–15 at Leslie's Pool Supplies or Pinch A Penny) - Silicone pool lubricant — a tube or small jar; do not substitute petroleum jelly - Drain-plug O-rings for your pump and filter (including the Pentair drain plug with O-ring if you have Clean & Clear equipment) - Union O-rings for 1.5" and/or 2" unions on your suction line (know your pipe diameter before shopping) - Spare strainer basket if yours is cracked or warped
Pro-only parts — do not buy without professional guidance: - Replacement run capacitor — only purchase if you are experienced with motor electrical systems AND have confirmed the exact µF and voltage spec from your pump's data plate. This is model-specific pool equipment parts territory, not a generic swap.
Pro Tip: Before pool season opens each year — especially in Sun Belt states — pull the lid O-ring and drain-plug O-rings, inspect them, and replace anything that looks marginal. A $15 preventive O-ring kit in April prevents a $150 emergency service call in July.
How long it should take to prime a pool pump and when to stop DIY
Once the root cause is addressed — water level corrected, basket cleared, O-ring replaced — a healthy pump typically primes within 60–90 seconds of restart. You should see water rising steadily in the clear strainer lid, the basket should fill completely, and pressure should register on the filter gauge within 2–3 minutes. If it takes longer than 5 minutes of continuous running without a rising water column, shut it off and keep troubleshooting rather than letting the pump spin dry.
For troubleshooting time, plan on this budget:
~10–20 minutes: Water level check, skimmer basket and pump basket cleaning, lid O-ring inspection and replacement. These are the high-probability fixes. Do them first every time.
~30–60 minutes: Lid inspection, suction-side union and fitting check, drain-plug O-ring inspection and replacement, impeller debris removal. These require opening more of the system and potentially two or three test runs to confirm the fix held.
Longer, or hand it off: Any electrical diagnosis — capacitor, motor, wiring, GFCI, or breaker issues — has no reliable DIY time estimate because it depends on what you find and whether you have electrical experience. Budget for a professional if you reach Step 7 and the problem persists.
The DIY cutoff is simple: if you have done Steps 1–6 thoroughly and the pump still won't prime or still loses prime within a few hours, the repair has moved past what a straightforward checklist can solve. At that point, the cost of a pool service call — typically $75–200 for a diagnostic visit in most US markets — is far cheaper than a motor or pump replacement caused by continued dry-running.
When to call a pool pro or licensed electrician
When to Call a Pro: Call a licensed pool technician or electrician immediately — before running the pump again — if you encounter any of the following: - Breaker trips when you attempt to start the pump (once is a flag; twice is a stop) - Motor hums but won't start even after you've cleared debris from the impeller and confirmed the shaft spins freely - Burning smell near the motor or wiring - Loose, corroded, or unknown wiring at the motor terminals, junction box, or timer - Repeated prime loss — the pump primes, runs for a few hours, loses prime again, and you've already confirmed the water level, baskets, and O-rings are fine - Cracked pump housing — no sealant or O-ring fixes a crack in structural plastic - Warped seal plate — visible gaps or distortion where the motor mounts to the pump pot - Any capacitor replacement if you don't have hands-on experience with pool-motor electrical systems
As Leslie's Pool Supplies' troubleshooting guide states directly: "If current is in doubt, contact a licensed electrician." That guidance isn't hedging — it's a hard boundary. Pool pumps run at 120V or 240V, often near water, and with GFCI protection that exists specifically because the failure modes are dangerous. When the electrical side goes wrong, the fix belongs to someone with the training and equipment to do it safely.
For pool service visits, explain your diagnostic steps when you call — "I've checked water level, baskets, O-rings, suction fittings, and drain plugs; the pump hums and won't start after clearing the impeller" — so the tech arrives knowing exactly where to start. That saves time and often reduces your bill.
Pool pump priming FAQ
How do you prime a pool pump that has lost prime?
Start by checking the water level — it needs to sit at the midpoint of the skimmer opening. Then clear both the skimmer basket and pump strainer basket. Fill the pump pot with water from a hose, reinstall the basket and lid with a lubricated O-ring seated correctly, and start the pump. Watch the clear lid — water should rise within 60–90 seconds. If it doesn't, shut off the pump and work through the seven-cause diagnostic sequence above, starting with the lid O-ring and moving toward suction-side fittings and unions.
Can a bad O-ring cause a pool pump not to prime?
Absolutely. The lid O-ring creates the airtight seal between the clear strainer lid and the pump pot. A dry, flattened, cracked, or pinched O-ring allows air to enter the suction side continuously, which prevents the pump from ever fully displacing air from the suction line. Pentair's troubleshooting documentation lists "Replace O-ring" as a core corrective step for prime loss. Union O-rings on suction-side fittings have the same effect when they fail. Replacement O-rings are inexpensive pool equipment parts and are the first thing to check after water level and basket cleanliness.
Why is my pool pump humming but not starting?
A hum with no shaft movement, after you've confirmed the impeller is clear of debris and the shaft spins freely, points to a failed run capacitor or a motor winding fault. The capacitor is the cylindrical component on the motor housing that provides the startup current. When it fails, the motor receives power but can't overcome its own inertia. Leslie's troubleshooting guide treats this as the electrical diagnostic branch — check the power supply, timer, and breaker first, then the capacitor. Capacitor replacement requires a model-matched part and electrical experience; if you're unsure, call a licensed pool service technician or electrician.
How long should it take a pool pump to prime?
A properly functioning pump in good condition — with the right water level, clean baskets, and healthy O-rings — typically primes within 60–90 seconds of startup. You should see the strainer basket fill completely with water and the filter pressure gauge rise to its normal operating range (typically 10–25 PSI, depending on your filter and plumbing setup) within 2–3 minutes. If the pump runs for 5 minutes or more without the basket filling, shut it off to prevent dry-running damage and restart the diagnostic steps above.
Related reading on pool service and pool equipment parts
If the pump still loses prime after you've worked through all seven causes — or if you've confirmed the problem is electrical — the next step is finding qualified pool service help or sourcing the right pool equipment parts for your specific pump model.
Understanding your full equipment setup helps before any service call. If your filter is part of the issue — reduced flow, high pressure readings even when the pump does prime, or a pressure gauge that doesn't move — that's a filter-side problem that runs parallel to the pump. Pool filter troubleshooting, cartridge replacement schedules, and backwash cycles for DE and sand filters are all covered in our pool filter and pool maintenance guides.
If you're looking at a motor replacement rather than a repair, our pool pump buying guide walks through the case for variable-speed pumps — which now dominate the residential market, are required in California and several other states, and pay back their higher upfront cost through electricity savings. For homeowners whose pump is more than 8–10 years old, a repair estimate above $300–400 often makes the math favor replacement over fixing a pump that's near the end of its useful life.
Regular preventive maintenance — O-ring inspections at the start of season, basket cleaning weekly during heavy use, and water-level checks every few days in summer — keeps most pumps running reliably for 8–12 years without a major service event.
Sources & References
- Leslie's Pool Supplies — Pool Pump Troubleshooting Guide — Primary manufacturer-aligned troubleshooting source; covers power, timer, breaker, impeller, capacitor, and electrical escalation
- Leslie's Pool Supplies — How to Prime a Pool Pump — Definition of priming and correct basket-fill procedure
- Pentair — OptiFlo Pump Will Not Prime (Partner Portal) — Manufacturer-documented diagnostic sequence for prime-loss causes
- Pentair — OptiFlo Pump Product Page (SKU 347983) — Cam and Ramp lid design reference; lid-crack and O-ring replacement guidance
- Pentair — Clean and Clear Plus Cartridge Filter Page — Air bubble return-line documentation; suction-side defect reference
- Pentair — SuperFlo Pump Owner's Manual (PDF) — California Title 20 CCR single-speed pump restriction (sections 1601–1609)
- Leslie's Pool Supplies — Pentair Drain Plug with O-Ring for Clean & Clear — Drain-plug O-ring product reference; parts availability confirmation
- California Energy Commission — Pool Controls Proceeding — Pool pump scheduling and load-management standards for California
Keywords: pool pump priming, suction-side air leak, lid O-ring, union O-rings, drain plug O-rings, impeller, run capacitor, GFCI breaker, skimmer basket, pump basket, seal plate, licensed electrician, Sun Belt evaporation, Leslie's Pool Supplies, Pinch A Penny